Envoy Proxy Logs
Envoy 代理是专为云原生应用程序设计的开源服务代理。这种高性能分布式代理适用于单个和大型服务以及应用程序。Site24x7 AppLogs为 Envoy 代理日志提供内置支持。
入门
1. 登录您的 Site24x7 帐户。
2. 下载并安装Site24x7 服务器监控代理( Windows | Linux )。
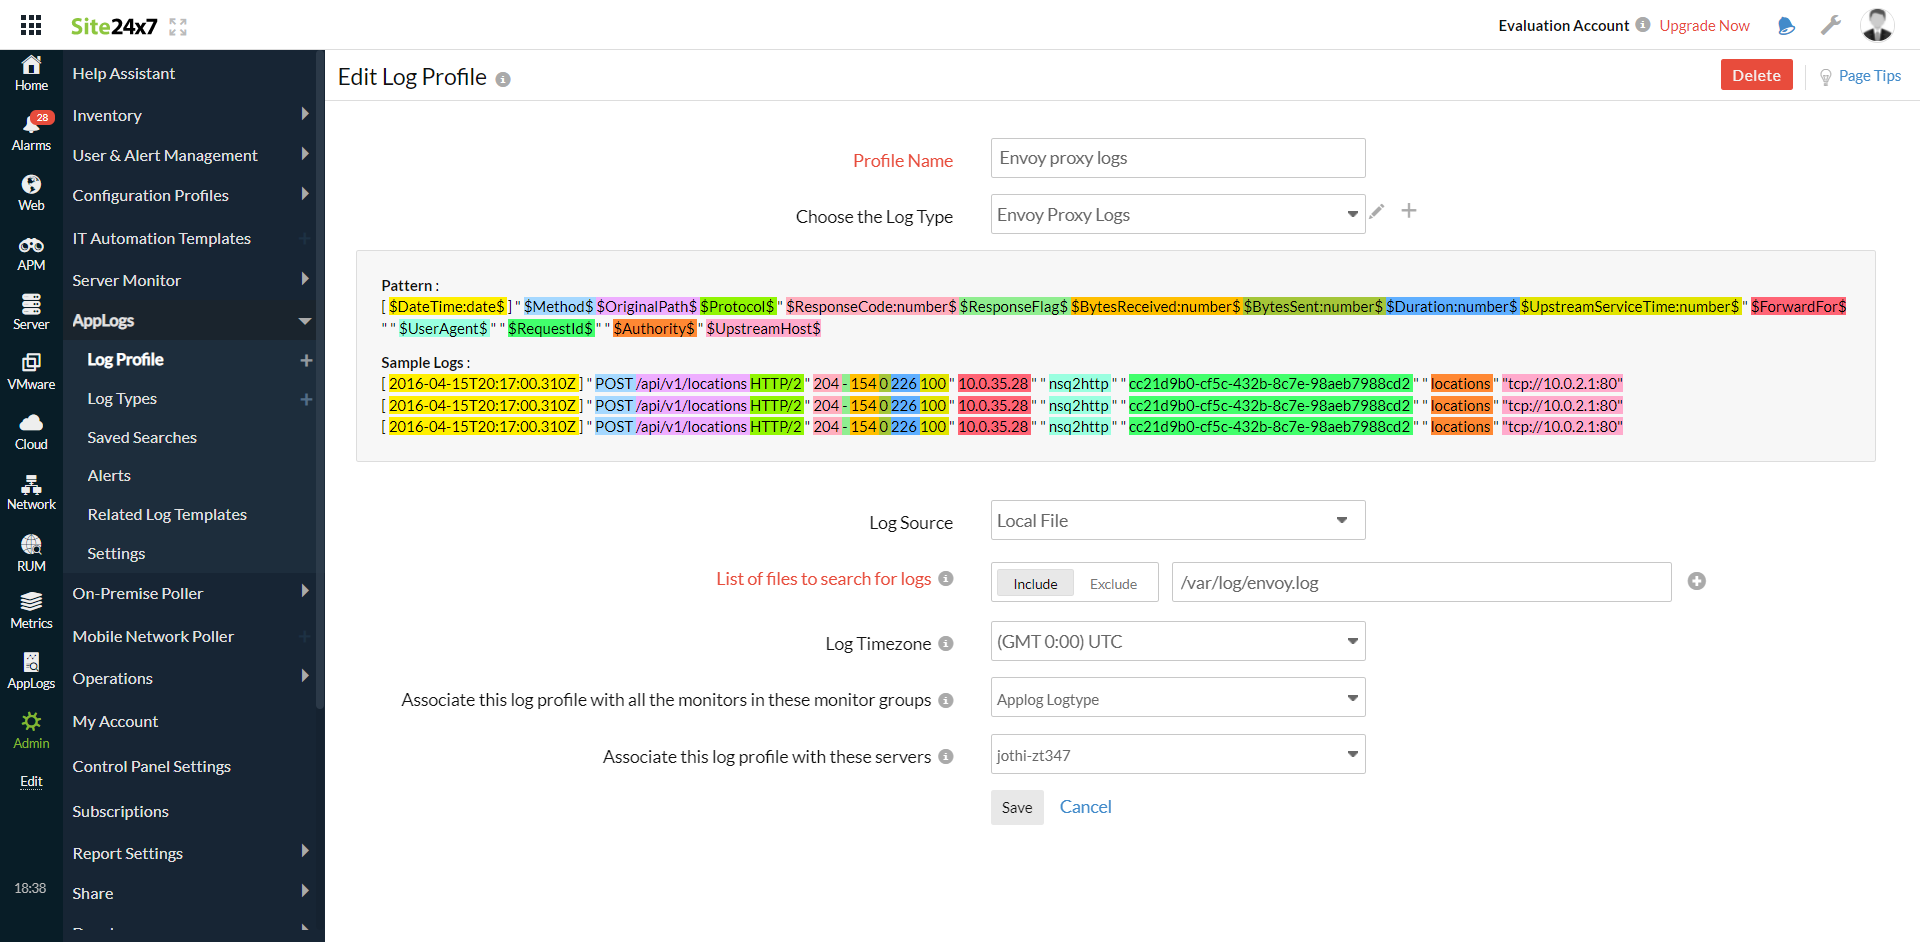
3. 进入管理 > AppLogs > 日志配置文件并选择添加日志配置文件。
4. 输入配置文件名称。
5.从选择日志类型下拉列表中选择Envoy 代理日志。
- 示例日志和日志模式如下所示。
示例日志:
[ 2016-04-15T20:17:00.310Z ] " POST /api/v1/locations HTTP/2 " 204 - 154 0 226 100 " 10.0.35.28 " " nsq2http " " cc21d9b0-cf5c-432b-8c7e-98aeb7988cd2 " " locations " "tcp://10.0.2.1:80"
[ 2016-04-15T20:17:00.310Z ] " POST /api/v1/locations HTTP/2 " 204 - 154 0 226 100 " 10.0.35.28 " " nsq2http " " cc21d9b0-cf5c-432b-8c7e-98aeb7988cd2 " " locations " "tcp://10.0.2.1:80"
[ 2016-04-15T20:17:00.310Z ] " POST /api/v1/locations HTTP/2 " 204 - 154 0 226 100 " 10.0.35.28 " " nsq2http " " cc21d9b0-cf5c-432b-8c7e-98aeb7988cd2 " " locations " "tcp://10.0.2.1:80"
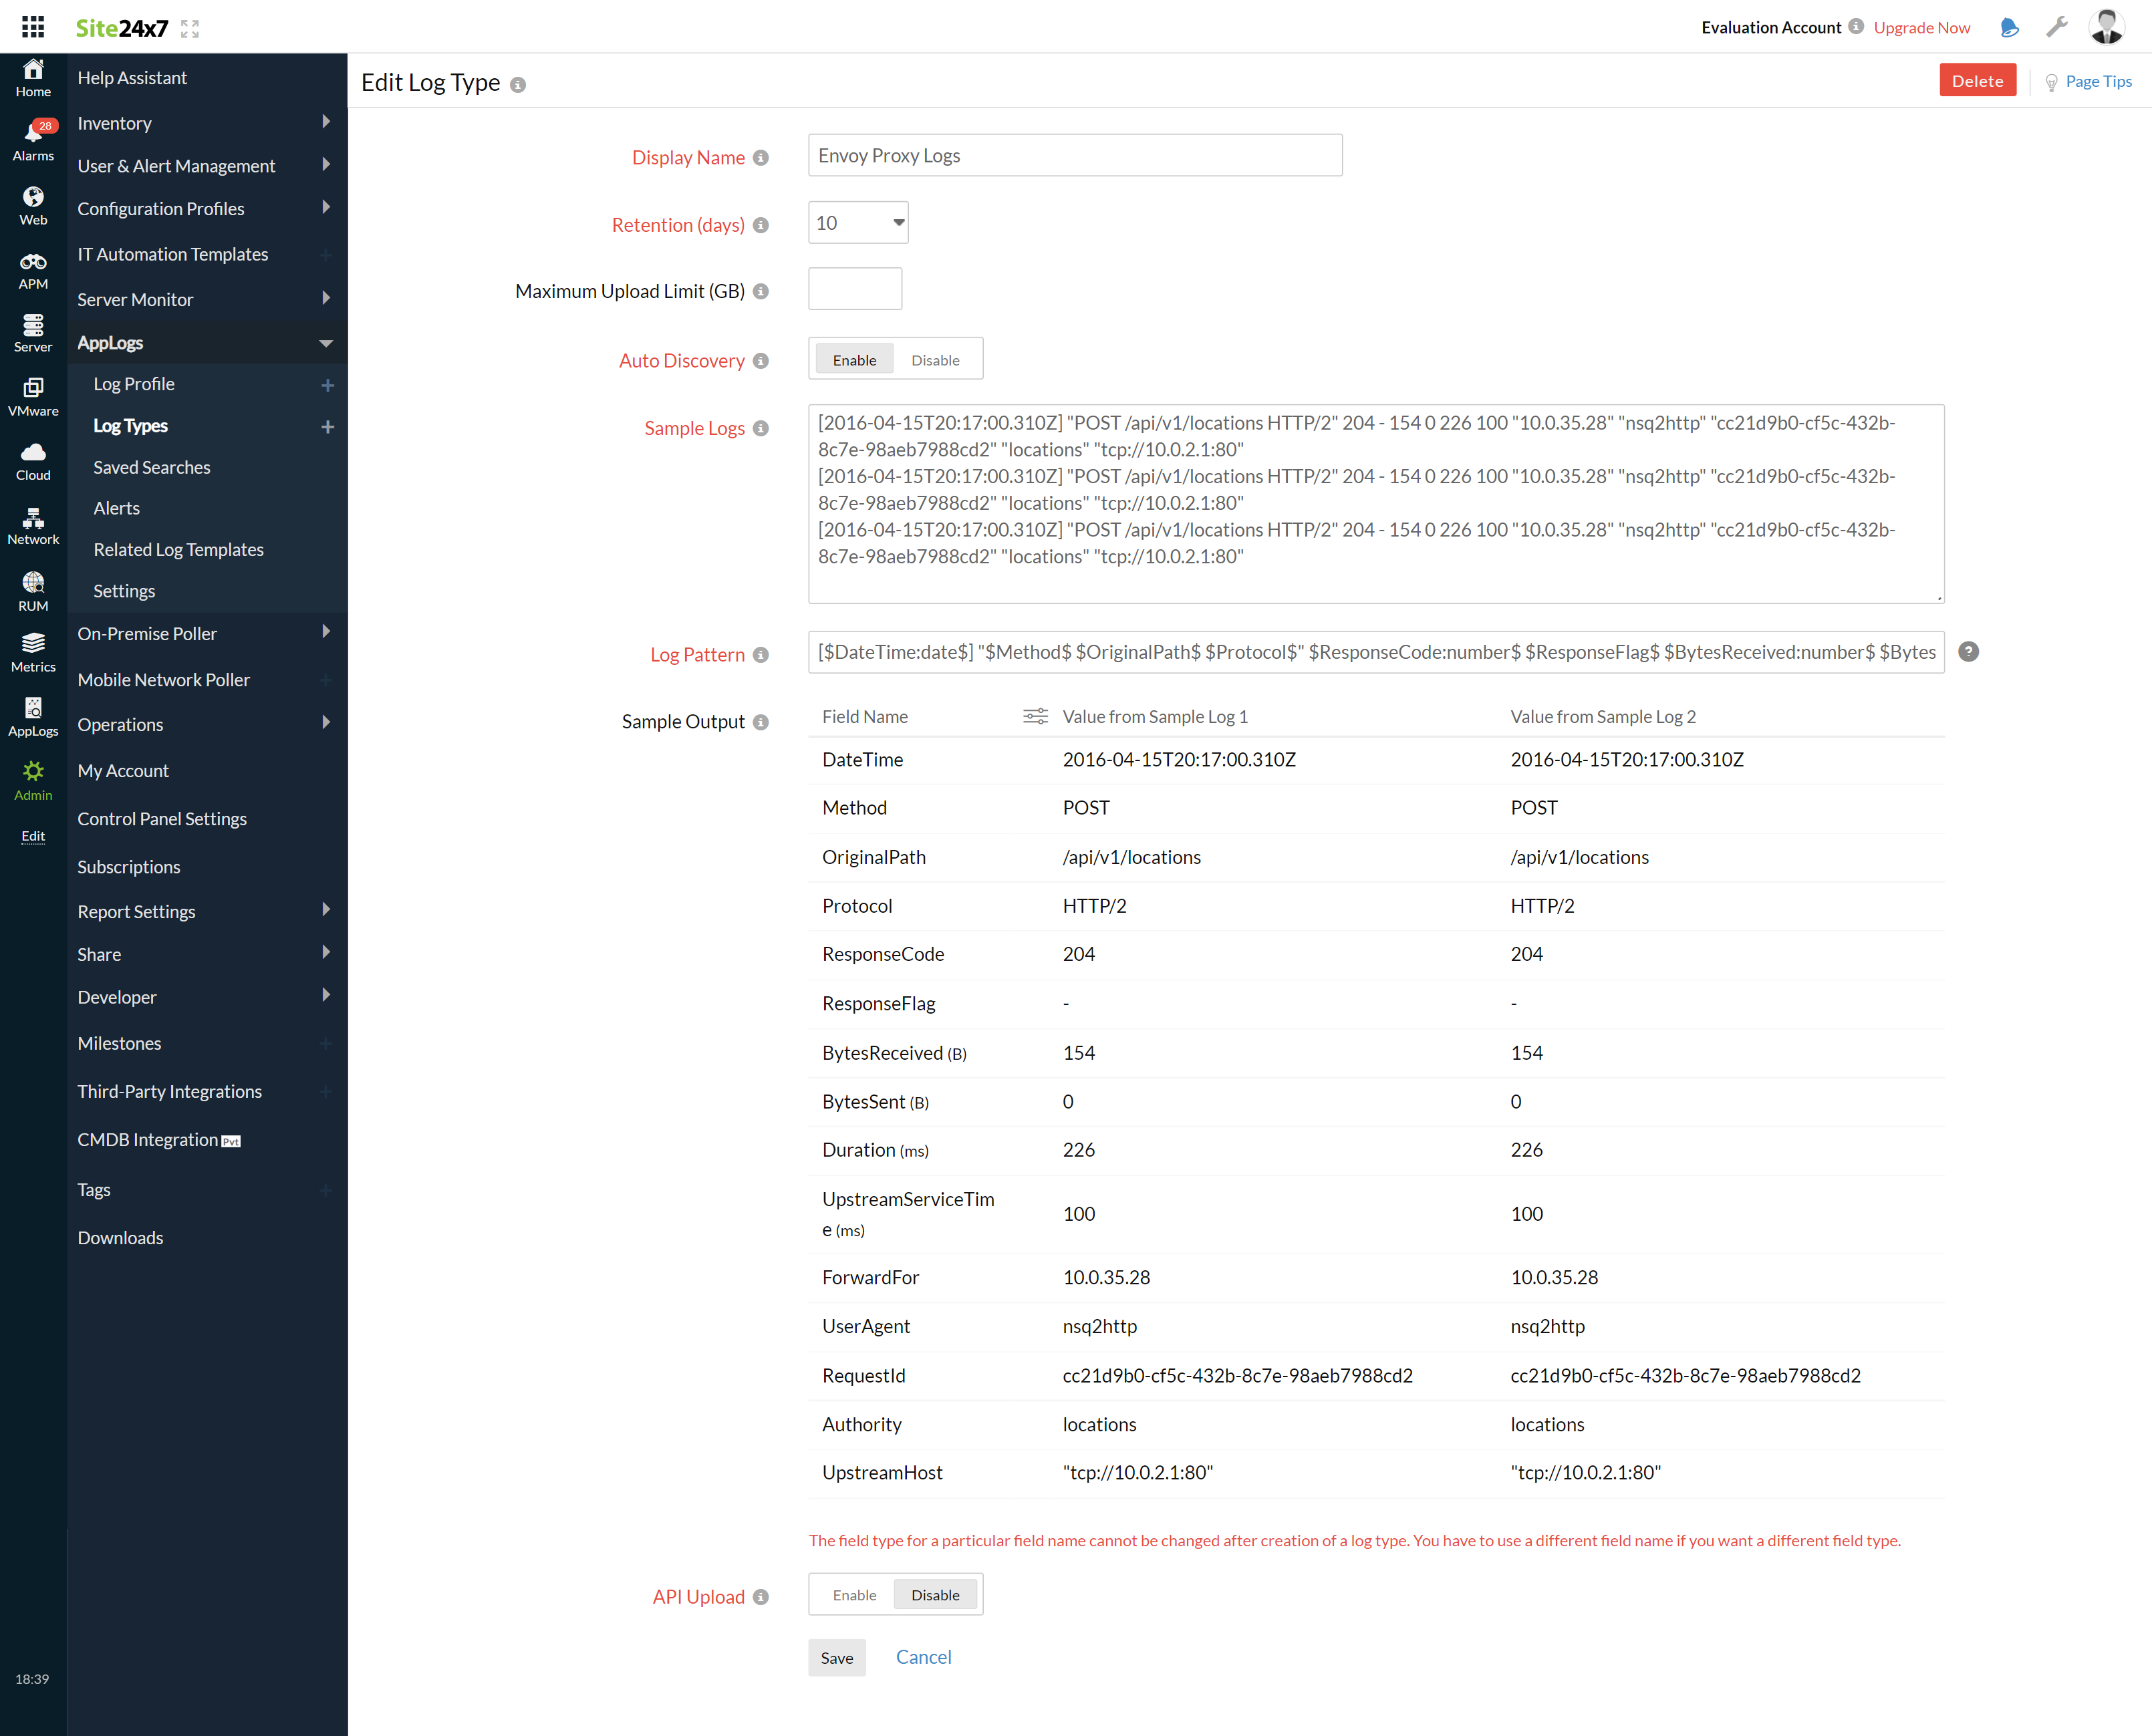
These logs are separated into fields, each of which takes its respective value and is then uploaded to Site24x7.
- 默认情况下,这是 AppLogs 为 Envoy 代理日志识别的日志模式:
[ $DateTime:date$ ] " $Method$ $OriginalPath$ $Protocol$ " $ResponseCode:number$ $ResponseFlag$ $BytesReceived:number$ $BytesSent: number$ $Duration:number$ $UpstreamServiceTime:number$ " $ForwardFor$ " " $UserAgent$ " " $RequestId$ " " $Authority$ " $UpstreamHost$
- 您可以添加自定义日志模式而不是默认模式。为此,请单击铅笔图标并指定您的模式。

6.选择本地文件作为日志源。
7、默认使用以下路径作为文件源:
Linux:“/var/log/envoy.log”
- 如果您的源路径与默认路径不同,请在要搜索日志的文件列表字段中指定。
8. 选择要收集的日志或日志组

9. 点击保存。
仪表板
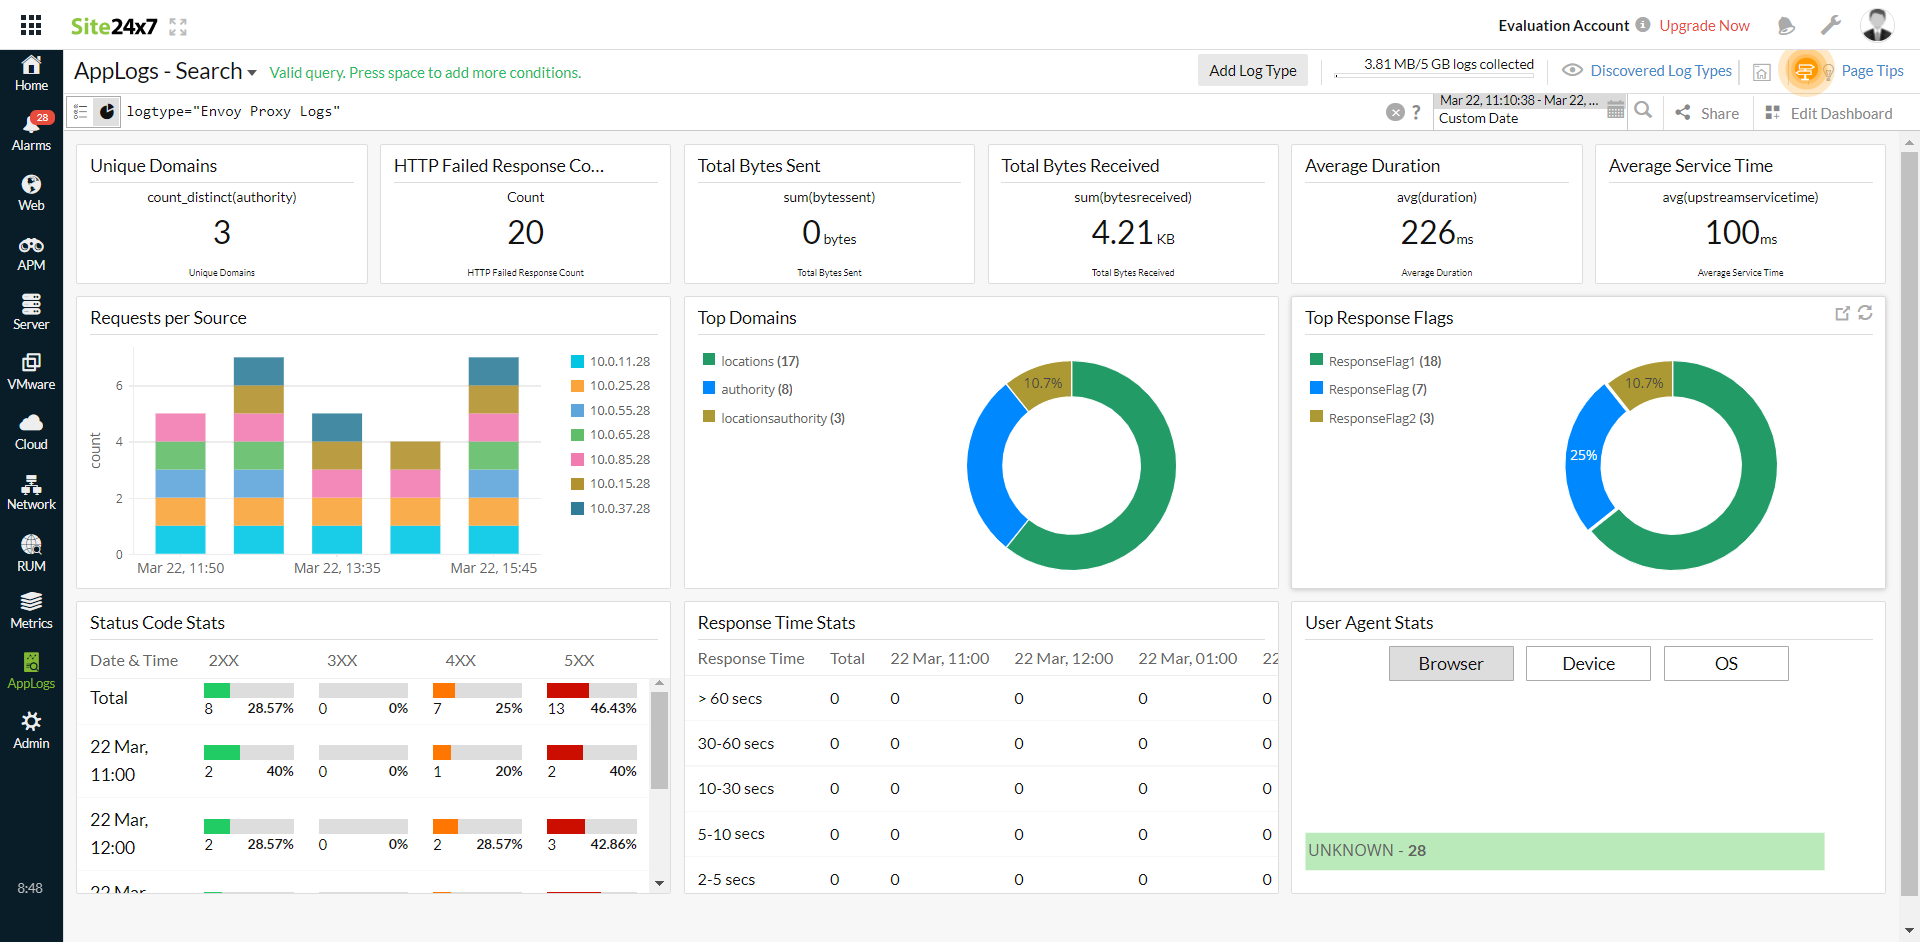
AppLogs 为每种日志类型创建一个专属仪表板,并默认显示一些小窗件。以下是 Envoy 代理日志仪表板上可用的小窗件列表:
- 唯一域
- HTTP 失败响应计数
- 发送的总字节数
- 收到的总字节数
- 平均持续时间
- 平均服务时间
- 每个源的请求
- 顶级域名
- 顶部响应标志
- 状态码统计
- 响应时间统计
- 用户代理统计
